Madeleyne: the wedding invitation that opens like an envelope (mini tutorial)
Learn how to use Madeleyne, Nupcii's interactive template: an envelope that opens, a three-photo cover, and featured photos, step by step.
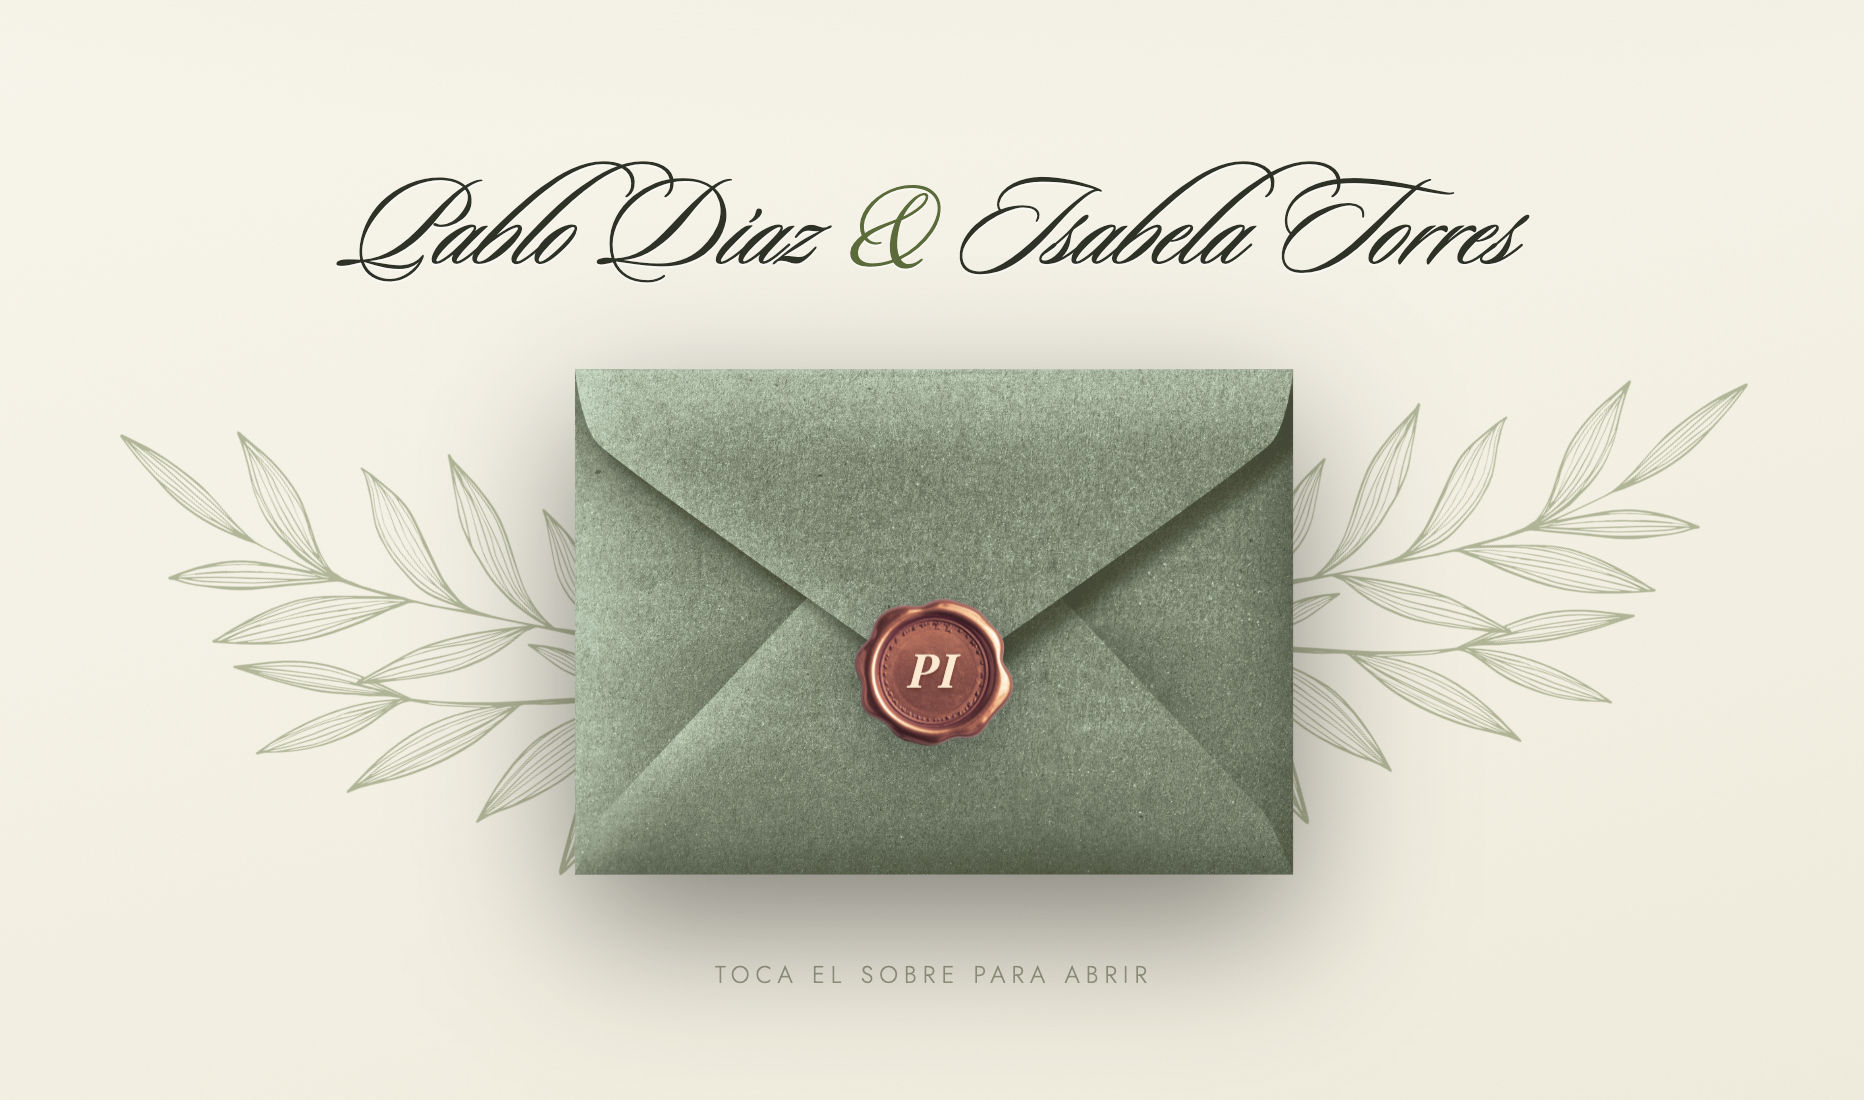
Some invitations are read, and some are experienced. With Madeleyne, our most special template to date, your guests don't land straight on the text: they first receive a closed envelope with a wax seal bearing your initials. They tap it, and the envelope opens to reveal the full invitation. Just like opening a real envelope, but from their phone.
It's Nupcii's first interactive template, and also the first one that lets you upload featured photos: three extra images placed in strategic spots of the design, beyond the regular gallery.
In this mini tutorial we'll show you how to make the most of it, step by step and with zero complications. If you're just getting started, take a look at our guide on how to create a digital wedding invitation step by step first; here we'll focus on what makes Madeleyne unique.
💌 What makes Madeleyne different
Two things, mainly:
-
The interactive envelope. When a guest opens their link, the first thing they see is a closed envelope with a wax seal. When they tap it, the envelope opens with an elegant animation and the invitation appears. If you enabled music for your event, it starts playing at that exact moment. It's a small detail with a huge reaction: the invitation feels like a gift being unwrapped.
-
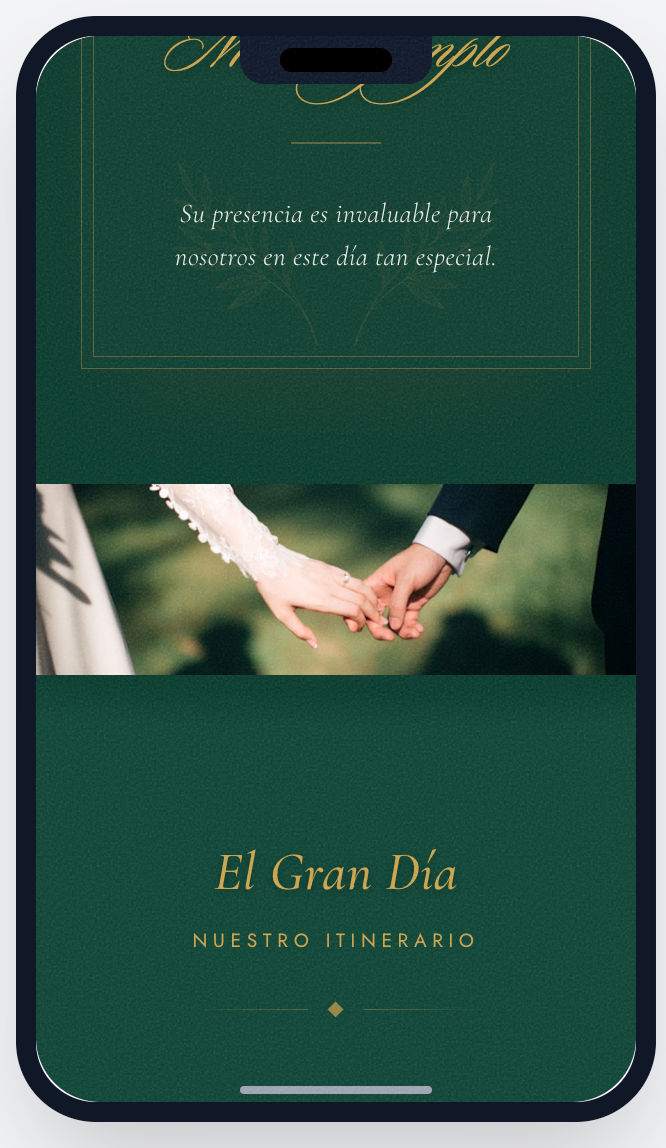
Featured photos. On top of the regular gallery, Madeleyne displays photos in three fixed positions of the design: two on the cover, on each side of your names, and a panoramic ribbon further down. You decide which photo goes where.
Add to that its aesthetic: deep jewel tones with gold details (emerald, onyx, and Tuscan wine), a light olive-green variant, calligraphy, laurels, and a wax seal. Renaissance, romantic, and high-end.
And why that name? Because Madeleyne is the name of the first client who trusted Nupcii: the very first person to purchase a plan when we were just getting started. It felt only right that our most special template should carry her name.
Madeleyne, if you're reading this: thank you for believing in us before anyone else. This template is our tribute to you. ✨
💡 Nupcii Tip: Madeleyne is a premium template, available with the Celebración plan. If you don't have it yet, you can still explore it in the template catalog and experience the full demo.
🎨 Step 1: choose Madeleyne in the editor
Go to your event and open your invitation editor (the Customize button). In the templates tab, select Madeleyne and pick the palette that best matches your wedding: there are dark jewel-toned ones (emerald, onyx, and wine) and a light olive-green one with warm white paper.
As soon as you select it, you'll notice two new things in the editor:
- A View intro button above the preview, so you can experience the envelope anytime.
- A new tab called Featured Photos, which only appears with this template.
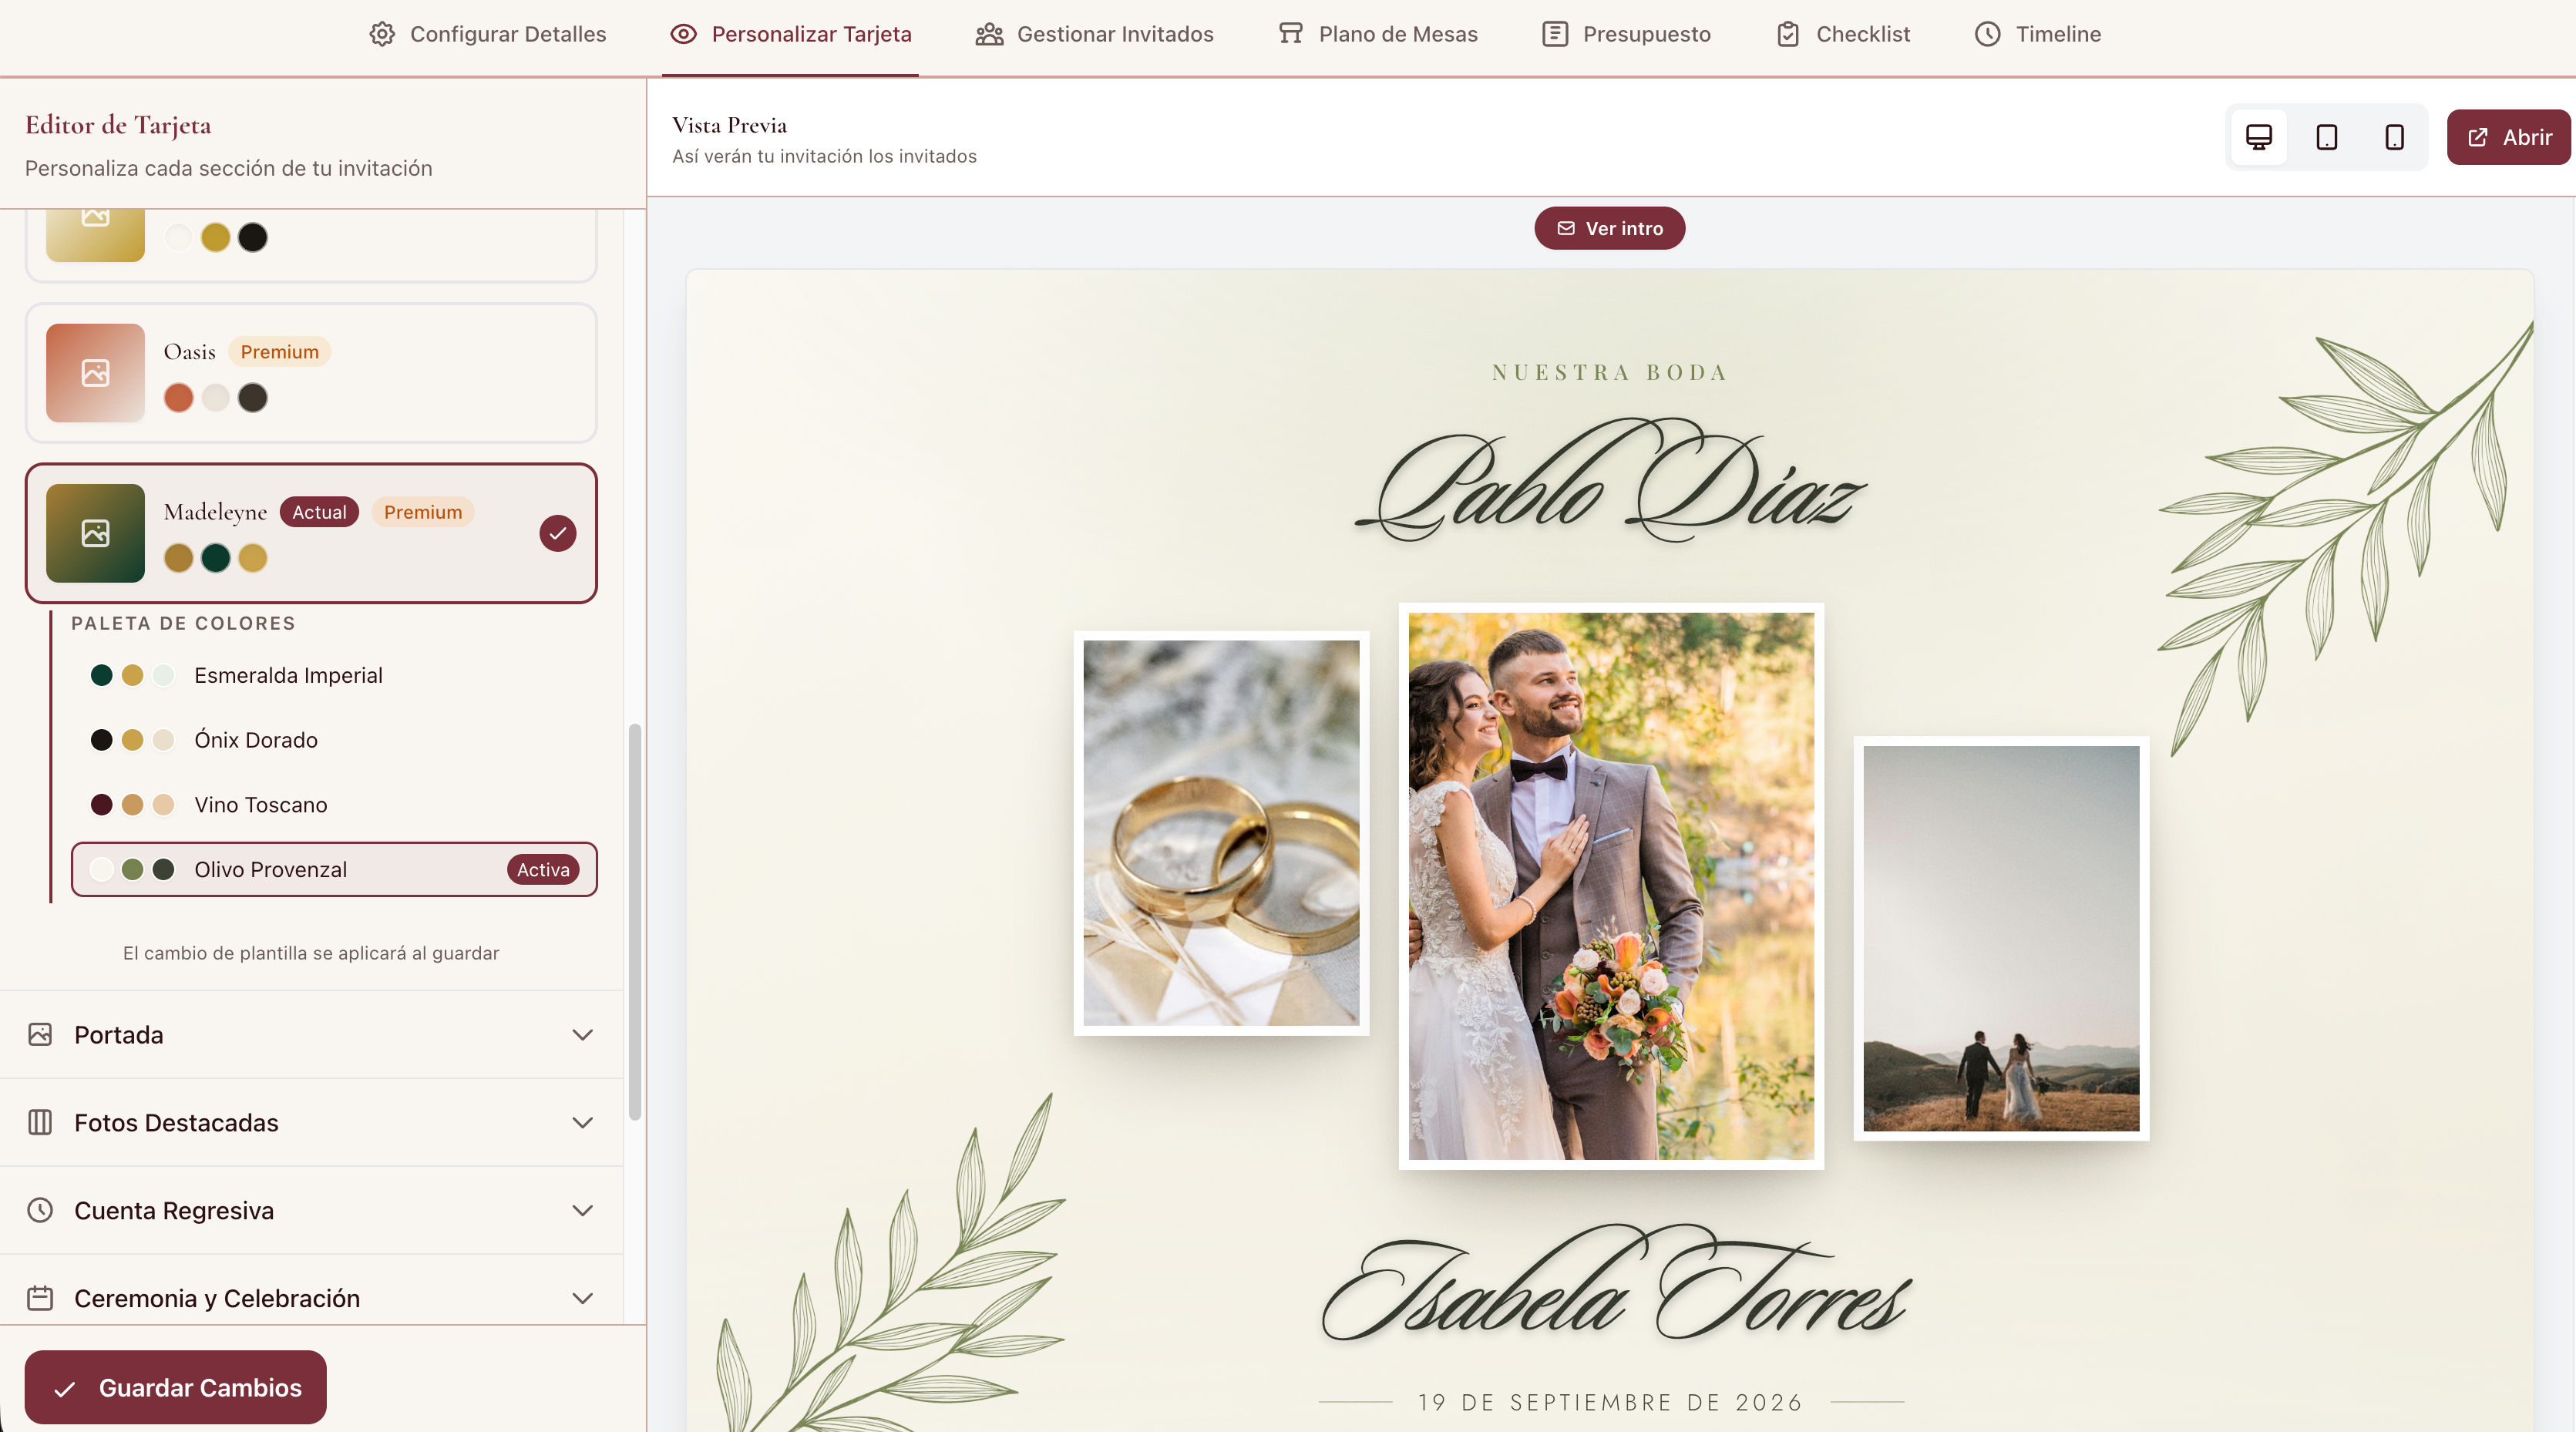
🖼️ Step 2: understand the three-photo cover
Madeleyne's cover is an editorial triptych: three staggered rectangular photos with your names in calligraphy at the center.
- The center photo is your usual cover photo, the same one you upload in the cover section of the editor.
- The two side photos are featured photos: one to the left and one to the right of your names.
What if you don't upload the side photos? No problem: Madeleyne automatically uses the first two photos from your gallery to complete the cover. Your invitation always looks finished, even if you never touch the Featured Photos tab.
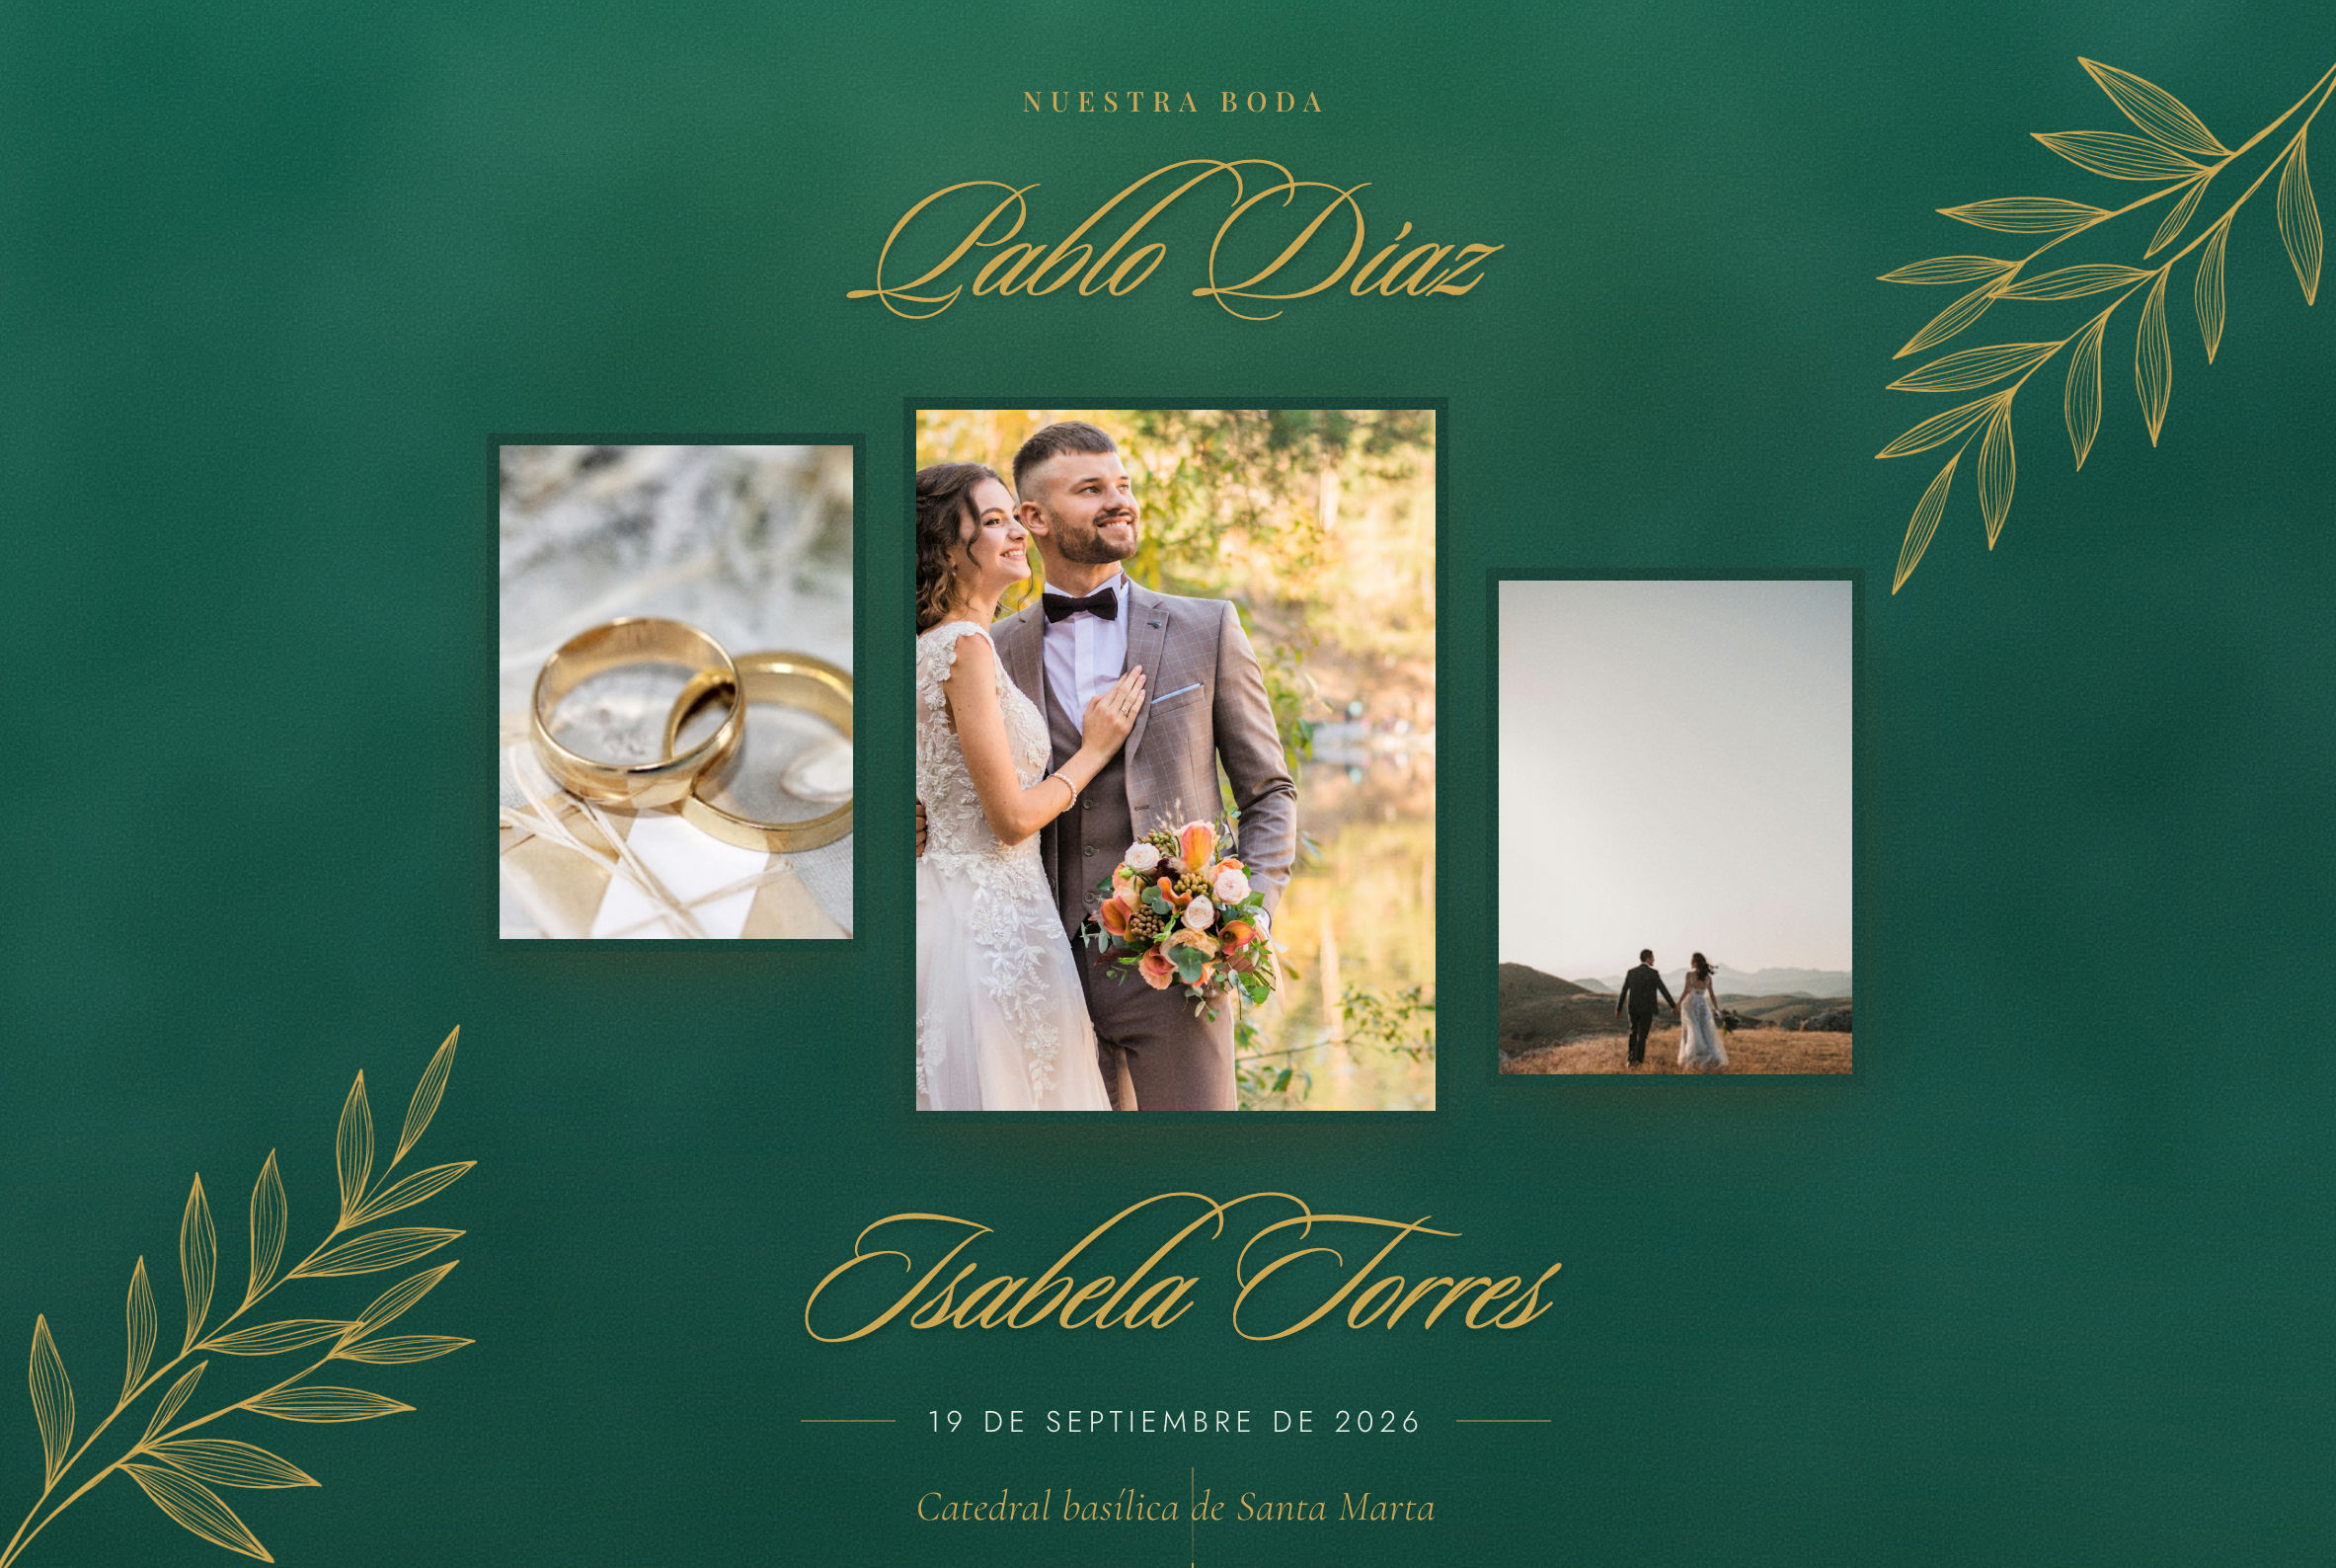
💡 Nupcii Tip: vertical photos (standing poses, portraits) work best for the sides. Save your horizontal shots for the ribbon, which is panoramic.
📸 Step 3: upload your featured photos
Now open the Featured Photos tab. You'll see three slots, each with a small diagram showing exactly where that photo appears within the invitation:
- Left side photo: appears to the left of your names, on the cover.
- Right side photo: appears to the right of your names, on the cover.
- Horizontal ribbon: a wide panoramic band that appears further down, below the greeting to your guests.
These are the same diagrams you'll see in the editor. The wine-colored area is where each photo appears:
Uploading a photo works just like the gallery: tap Upload photo, pick a JPG or PNG image up to 5MB, and that's it. The editor preview updates instantly, so you can try combinations until it looks perfect. If you change your mind, each slot has its own Replace and Remove buttons; when you remove a photo, that position goes back to using its matching gallery photo.
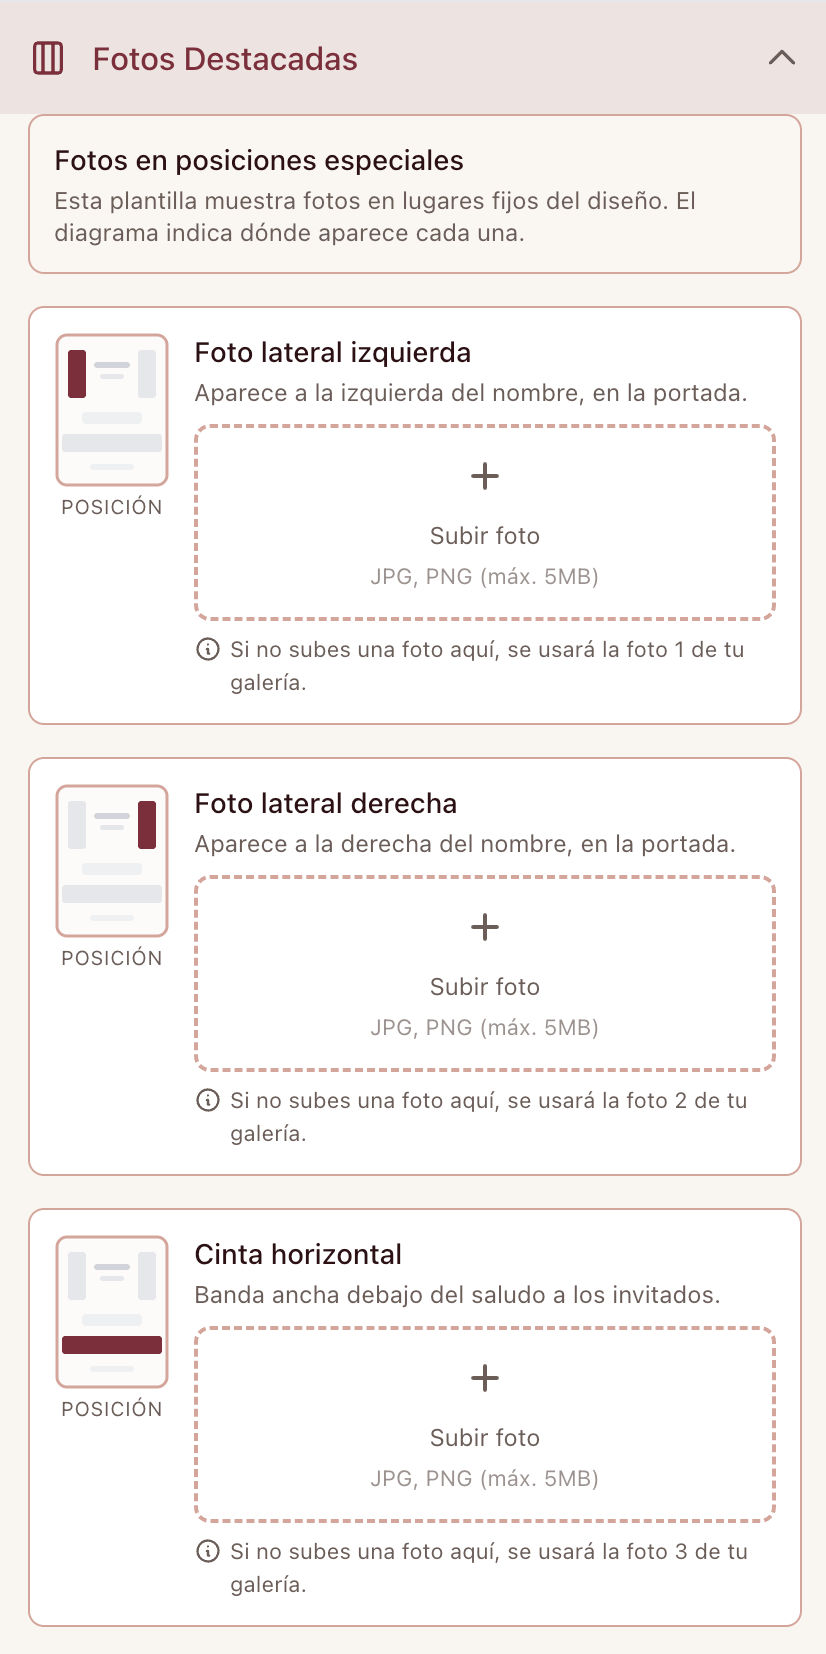
In short, here's what each position does if you upload nothing:
- Cover sides: they use photos 1 and 2 from your gallery.
- Horizontal ribbon: it uses photo 3 from your gallery. And if your gallery doesn't have a third photo, the ribbon simply doesn't show. It's completely optional.
💡 Nupcii Tip: the ribbon is the perfect home for that panoramic photo you never knew where to place: the proposal landscape, your hands intertwined, the sunset at your venue. Since it's a wide band, horizontal photos look stunning there.
✉️ Step 4: try the envelope experience
Before sending anything, experience your invitation the way your guests will. In the editor, tap the View intro button: the closed envelope appears over the preview, you tap the seal, and you watch it open with your invitation inside.
Replay it as many times as you like, with every palette, until that first impression is exactly what you dream of. When you're ready, save your changes and your invitation updates instantly for every link you send.
If you want to double-check what information should never be missing from your invitation (date, venue, dress code, RSVP), we have a short guide with the 7 elements every wedding invitation must include.
📋 In short
- Select Madeleyne in the editor and choose your palette.
- Upload your cover photo: it will be the center of the triptych.
- In Featured Photos, upload the two cover sides (or let your gallery fill them in).
- If you have a great panoramic photo, upload it as the horizontal ribbon; if not, that section won't appear and that's fine.
- Tap View intro, review the envelope experience, and save.
Five minutes, literally.
✨ Conclusion
Madeleyne turns the moment of opening your invitation into part of the gift: the envelope, the seal, the music kicking in, the photos you chose for every corner. It's the kind of detail your guests will talk about, and it's just a few clicks away.
If you don't have your invitation yet, create your free account, explore Nupcii's digital wedding invitations, and when you're ready for Madeleyne, the Celebración plan unlocks it along with every premium template, for a one-time payment of $19 USD.
✨ May the first thing your guests feel be exactly what you felt while planning it: that this wedding is special.
Ready to create your invitation?
Start free today. No credit card required.
Create my invitation for free